Wand Tricks | Page 2
Coin-Wand: Appearing Coin
You show both hands empty except for the wand. You show your left hand then your right hand. You close your left hand into a fist. Tap the fist with your wand then open your hand to show a quarter in your palm.
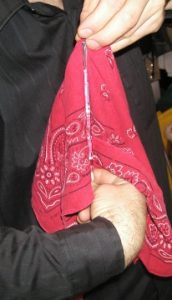
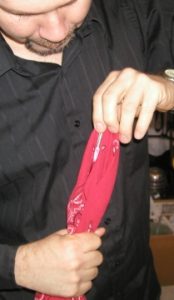
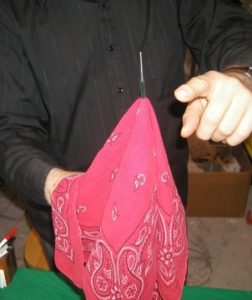
To set up you will need some clear scotch tape. make a loop with the sticky side out loose enough to fit on the wand so that it can slide on the wand easily (fig 1, 2 and 3)
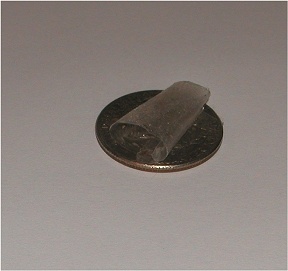
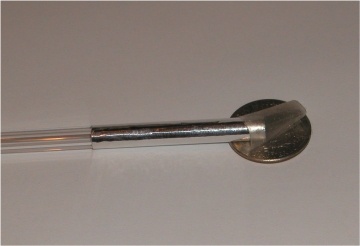

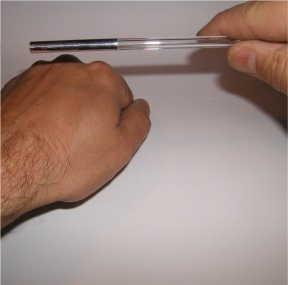
Figure 4
Hold the wand in your right hand like in figure 4 (this is from your view...make sure you don't tilt you hand for the audience to see nor let anyone behind you where they can see.)
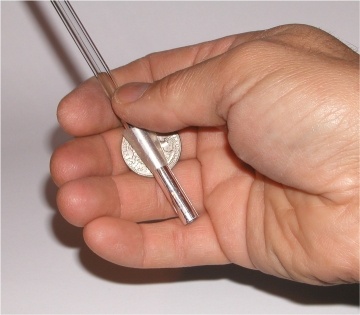
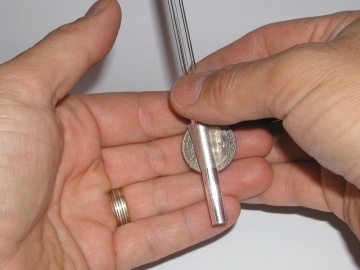
Figure 5
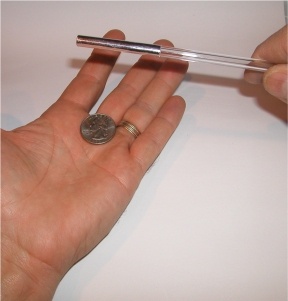
Show your left hand empty. Now you are going to show your right hand empty. With the left hand reach in behind the wand/coin and take them from the right hand. Then show the right hand empty.
Next, with the right hand take the wand back from left hand but this time hold the coin back and let the right hand just take the wand.(figure 6 and 7)
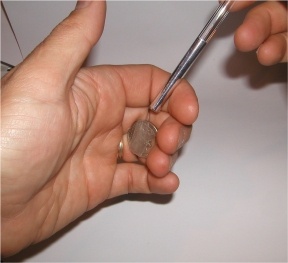
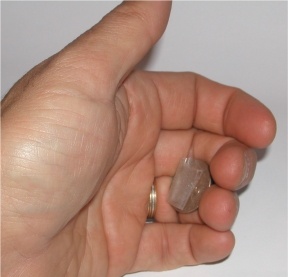
Close the left hand into a fist and then tap it with the wand. Roll your fist over and open it. The tape will help the coin stick to your palm so the coin will be face up (tape side down). When the tape is new it will be stiff and may lift the coin slightly off your palm. If you push down on the coin with your left thumb it will hold it down. Or if you cup your palm slightly it will appear to be just lying on your palm.
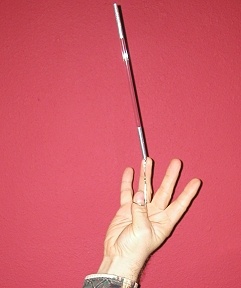
Static Wand | Wand on Hand
Example
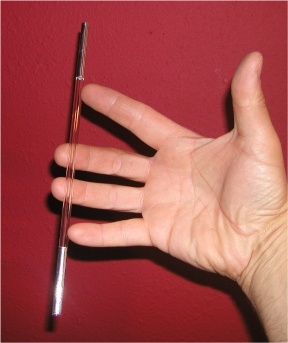
Earlier you learned how to make a coin stay on your hand using your other hand's finger or with string, or with another wand stick behind it. With this one it is just your hand and a wand. A little hand muscle is used too.
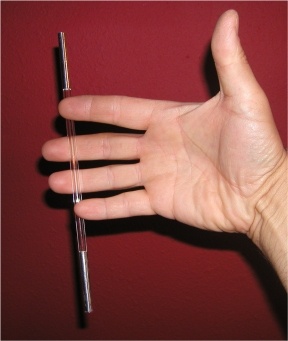
The Secret
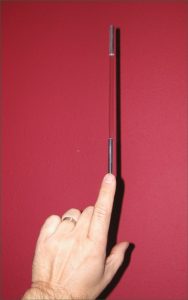
The picture shows an exaggerated view of what's happening. You are going to place the wand at the extreme tips of your fingers. Your index and pinky are going to push on the wand as your two middle fingers are pulling in on it. The outward and inward pressure keeps the wand at your finger tips. Start off like the exaggerated picture and slowly move it out a bit each time until you can get the wand looking like or better than the first picture above. Once you can get it looking good then you can rotate you hand and show it from all angles....it looks wild.
Balancing Wand
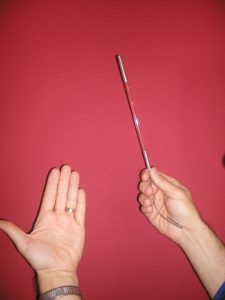
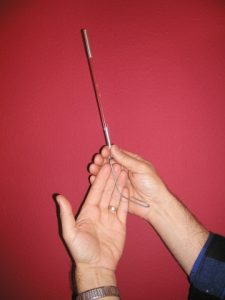
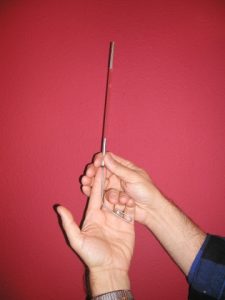
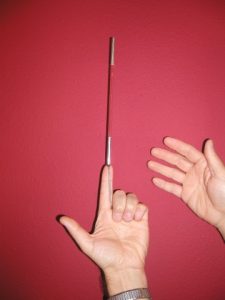
You show your left hand empty and make fist. Then you extend your index finger pointing upward and place your wand on it straight up! You let go of the right hand and it balances on the finger.(figure 1) Even when you slightly tilt it, it stays balanced. Then when you turn it all the way sideways it still stays balanced on your finger.(figure 2) You take the wand off your finger and hand it out for inspection.
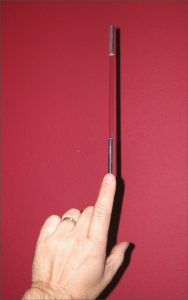
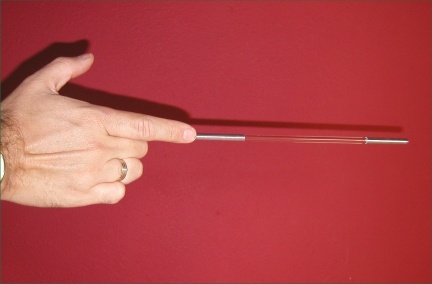
This will require a tube or hollow wand (these are the new style sold to people or given to volunteers at our shows). If you make a wand it will need to have a small hole drilled in one end if made of a solid rod or dowel.
You will also need a wire coat hanger. Cut the wire to look like figures 3, 4 and 5)
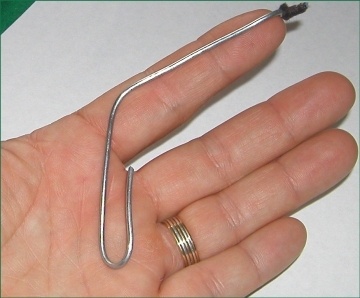
Notice the wire has a bend in the palm part for better handling control.
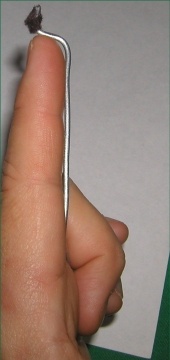
Notice the wire bends at the finger tip and then upward so the wand can slide into it.
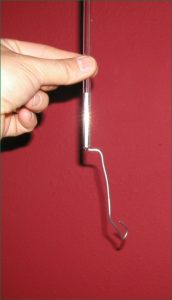
Here it is connected to the wand.
I didn't mention lengths. You will need to make it to fit your hand so the lengths will vary person to person. The idea is that the wire will hug against the inside of the index finger to the tip and against the palm held by the other fingers like in figure 2 in particular. On the tip that goes into the wand I have place a pit of felt. Figure 6 shows the felt brand I used. If the wire is snug in the wand already then don't worry about the felt. The felt is just there to make the wand fit snug onto the wire.
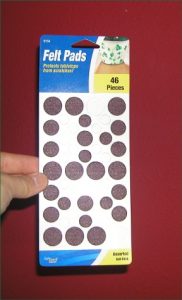
To start off put the wire on the wand like in figure 5.
Then hold it in your right hand like in figure 7. Figure 8 shows your view.
Your right hand will hide the wire but watch angles. Practicing in front of a mirror will help.
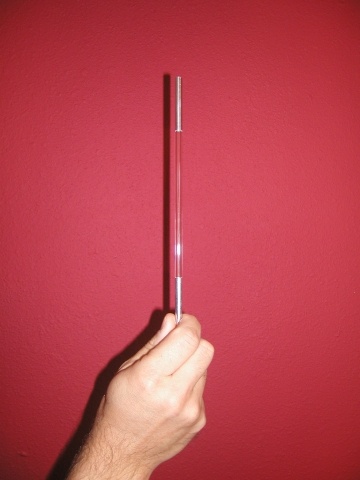
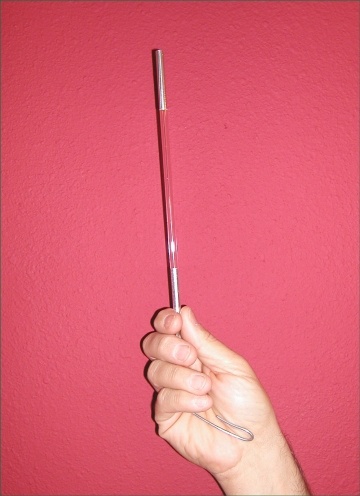
Show your left hand empty and hold it palm facing you, fingers upward.(figure 9)
bring the wand over with your right hand and pass the wire behind the left palm as you "place" the wand on your index finger. As you do this you can close your other fingers in your left hand grabbing the wire.(figure 10 and 11 and 12)
(Click on image to enlarge)
When you are finished showing off your "magical power" then you only need to reverse the steps. Straightening the left hand fingers and having the right hand take the wand back, Show your left hand empty and then pull the wand from the right hand pulling it off of the wire. Hand it out to be inspected. Don't rush but eventually slip your right hand into your pocket and ditch the wire.
Rolling Wand
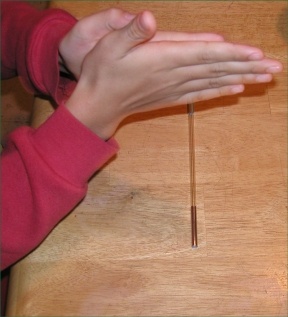
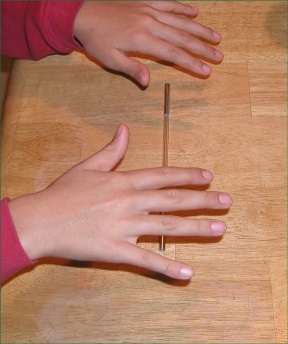
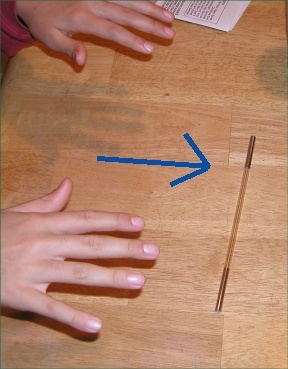
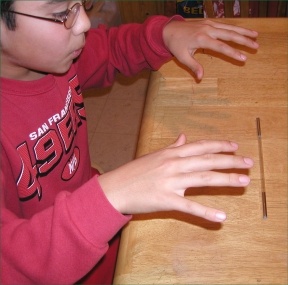
You place your wand on the table. Rub your hands together explaining you are creating kinetic energy (figure 1). You motion your hands over the wand, but never touch the wand (figure 2). After a few seconds the wand rolls away from you across the table. (figure 3)
Let the audience member hand it back to you because there is no gimmick: no strings, no wires, no hidden anything!
This is way easy! You just have to build up a lot of suspense and get the viewers attention on your hands and the wand. Once you have done that give a quick quiet puff of air from your lips (figure 4) aimed at the wand. It will roll away from you. Do not repeat! Remember...a QUIET puff! It helps if the room is noisy or has music going on!
Floating Wand | ala Bill Jackson
You interlock your fingers and show them front and back while you hold the wand in your mouth. With the interlocked hands you take the wand with your thumbs and then let go. The wand floats back and forth behind your hands, visibly a inch or two from the hands.(figures 1, 2, 3,4 )

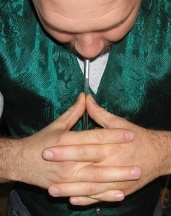
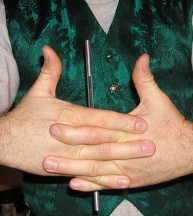
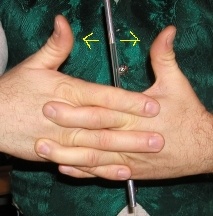
Pictures are worth a thousand words. The series of pictures below tell the story!

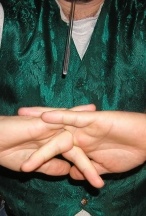
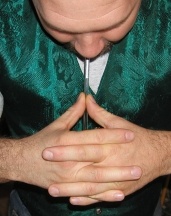
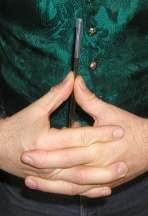
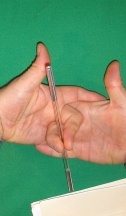
From figure 5 to 6 you will need to bring your two middle fingers in to the palm side just like the old "this is the church this is the steeple...."but with only the two fingers. This is the only part that will require a bit of practice to do so the audience won't be able to tell you did it. You also have to watch your angles (no one standing behind you or too close on the sides.
Make sure your other fingers pull tight and don't give up the fact that you are pulling in the middle fingers. Mirror practice will help you make it look natural. Figure 6 shows the fingers pulled in...you wouldn't show the audience that you are doing this.
Figure 7 shows you placing the wand into the grip of the thumbs...you are also getting a grip with your hidden middle fingers.(figure 8) Figure 9 shows you the fingers' grip from your view.
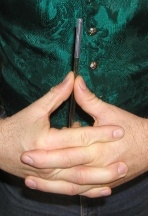
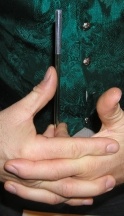
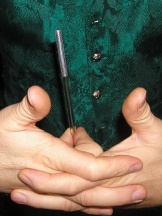
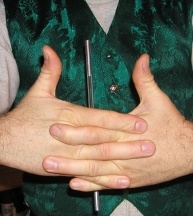
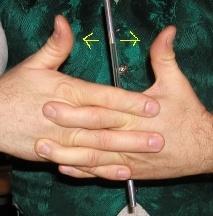
Figure 10 -12 show the hands tilted so you can see the fingers' grip. Notice in figure 10 you are holding the wand with both thumbs at first. Dramatically let go with one thumb (figure 11) then both (figure 12) then move it back and forth by moving your middle fingers back and forth.
To end it grab the wand with your mouth or drop it and then show your interlocked hands again front and back remembering to put your middle fingers back in the fold before you turn your hands palm-out.
Balancing Wand | ala Bill Jackson
You place your wand on your index finger. It wobbles but doesn't fall. You then toss it from your index finger to yur middle finger. Then to your ring finger, and back again. Each toss it wobbles but never falls. You take the wand off your index finger and hand it out to be inspected. (figures 1, 2, 3 )
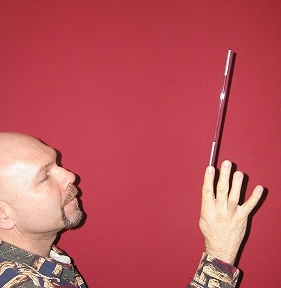
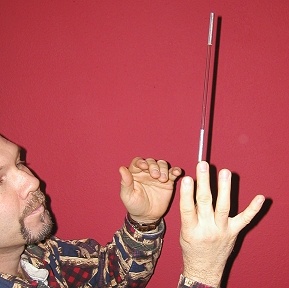
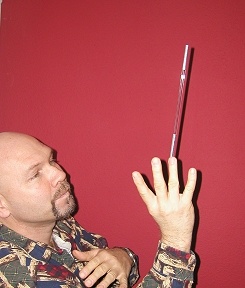
Bill is bold and you will need to be too. You will first need to make a really easy gimmick. Figures 4 and 5 show you the gimmick and the paper clip you make it out of.
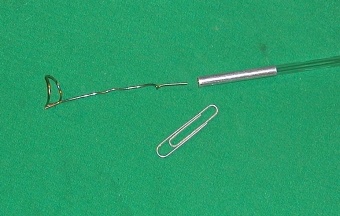
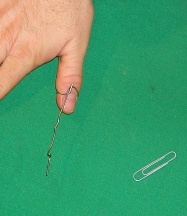
Notice the large paper clip is straightened then bent to fit around your thumb (figure 4). Figure 5 shows haw it goes on your thumb. Notice the placement on the thumb and put yours on the same way; with the upright of the gimmick along the thumb-nail. Also notice the kink or twist about a half-inch from the end. This will keep the wand from sliding all the way down the gimmick. The gimmick fits loosely in the wand to allow it to wobble when on. This gives you two things: 1. it gives you a realistic look to the balance. 2. it acts a misdirection when you are doing the trick. The wobble will attract the eye and keep eyes off the gimmick. BOLD.
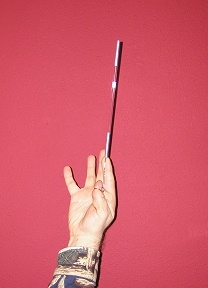
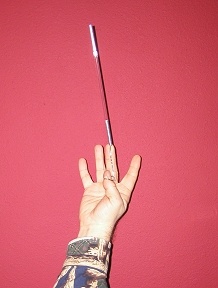
Start off with the gimmick on your thumb. Hold your hand like figure 1 (figure 6 from behind) and place the wand on the gimmick. Allow the wand to wobble by moving your hand like you are trying to keep it from falling...like when you really balance something.
With practice mimic a toss and move your thumb over moving the wand to the next finger and wobble. Do it again and then back again until you are back on the index finger.
The wobbling is important to keep the eyes on the wand. Your fingers will be slightly spread so the movement of the wand helps misdirect attention and hides the gimmick. You should keep the gimmick close against each finger as you perform this trick.
Bill's Color Changing Wand
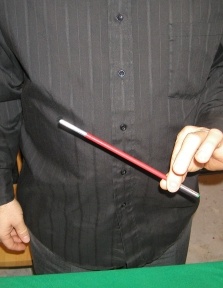
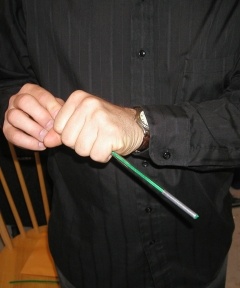
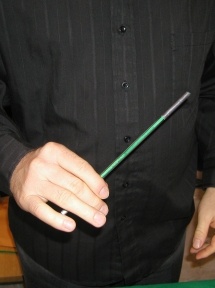
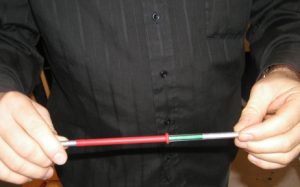
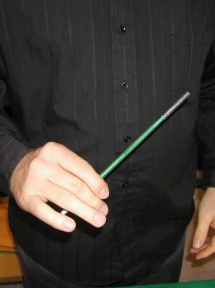
A red wand with silver tips changes color to a green wand with silver tips just by running it through your hand. Click on image to enlarge
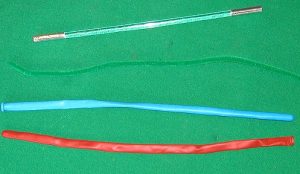
What you will need is shown in figure 4. You will need a 360 animal balloon. You can buy these at Walmart or a party supply store. They are the balloons you use to twist animal balloons. Any color is fine. In the picture I show two balloons to illustrate color choice; you only need one. You could change your wand from a colored wand to a clear wand But Bill Jackson came up with a cool idea. if you have a hollow wand you can put a craft pipe cleaner in it...customizing your wand to whatever color you want.
Ok, you will need to cut the end off a balloon. You now have a latex tube. put it on the wand lining it up with the silver tips. A very little amount of dishwashing soap may help slide it on, But then you need to let it dry after wiping the soap off. The lip of the balloon will make it easy to roll the balloon up as you push it through your fist. Then your thumb and index finger will hide the rolled up balloon when you display it after the color change.
Bill's Pen to Wand
You tell everyone you haven't a wand but your pen has always made a good wand. So you roll it up in a Hanky. when you unroll it it has changed into your magic wand!
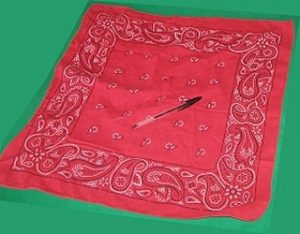
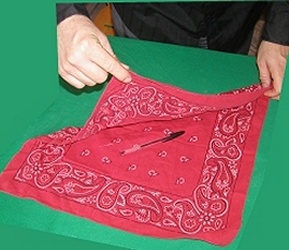
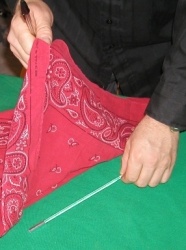
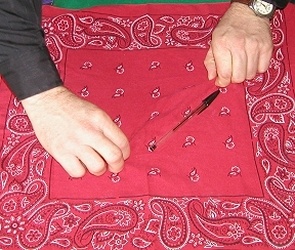
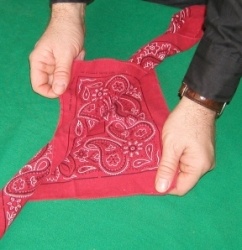
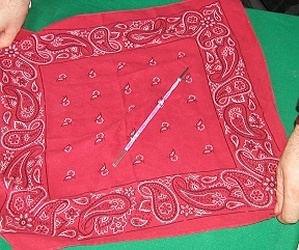
Place the wand on the table before your audience arise and lay your hanky over it like in figure 7 an 8. Place your pen on the hanky like in figure 8. (Bill is touching the wand in figure 8 to show you where it is. Don't do that in performance.)
In figure 9 Bill has folded the hanky over diagonally being careful not to show the hidden wand.
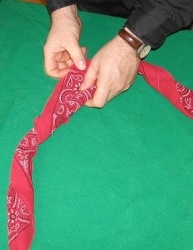
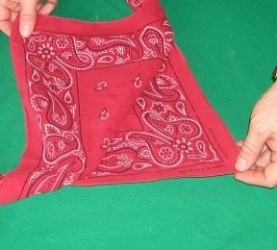
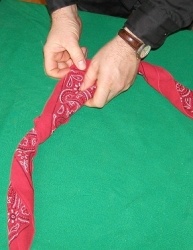
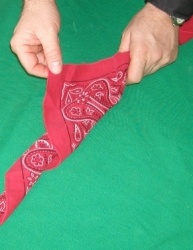
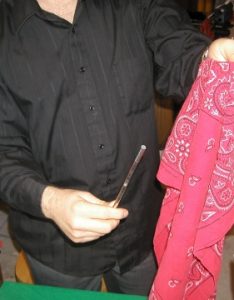
In figure 10 you see the wand and pen being rolled into the hanky. Practice this so that you get to the point where you don't flash then hidden wand. Once it is rolled up find the upper most flap of the hanky (figures 11 and 12). Take that flab in your left hand and the lower flab in your left hand (figure 13)and begin to pull them apart.Do this slowly.
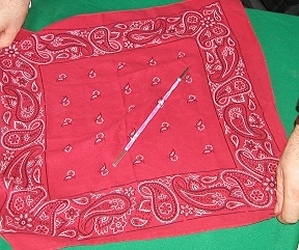
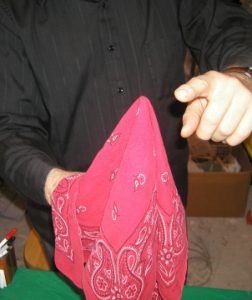
When the bundle is unrolled the wand is now on top (figure 14) and the pen is hidden under the hanky. Don't show the pen. Just pick up the wand and do a trick with it.
Bill's Wand Through Hanky
You take a wand and push it through a hanky. Even after the spectator taps the wand through the hanky proving it was really under it the wand still penetrates the hanky without damaging the cloth.
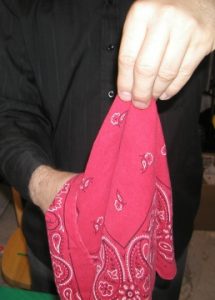
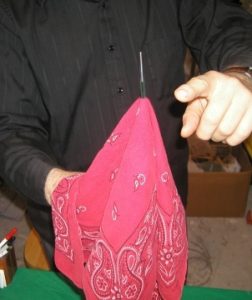
Hold your wand like in figure 1 and place a hanky over it as in figure 1 and 2. In figure 2 it is obvious the wand is really under the cloth. Even let someone feel it.
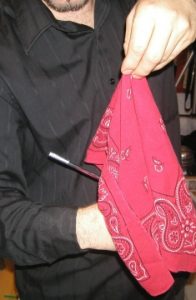
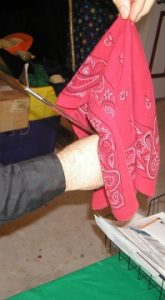
In figure 3 you see the wand is being grabbed by Bill through the cloth. In reality (figure 5 and 6 and 7) Bill isn't grabbing the wand. he is just grabbing the hanky, pretending he has the wand. as his other hand tilts the wand back out from under the cloth and back up along the back OUTSIDE of the hanky. Figure 8 shows how he wraps the cloth around the wand right before he pushes it "through" the cloth. Really it's just sliding along a crease up out of the top.


